Plasti Pole has launched a new A - Frame product called the The Pointer Board. As a result of market demand there is a requirement for flexible and economical A-Frame signs. The Plasti Pole Pounter board provides a modular system that is also cost effective.
The pointer boards is an outdoor signage product geared towards clients who use A- Frame signs in the real estate market.
This pointer board is an improvement both in design and cost on the existing products in the market. The hinge is pre-assembled and modular. The client is able to use their existing For Sale or To Let correx boards in the Plasti Pole Pounter Board product, cutting down on additional printing costs.
It is easy to assemble, comes in modular form and allows for different signage formats i.e. Portrait or Landscape.
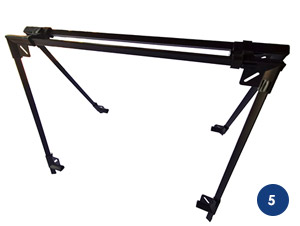
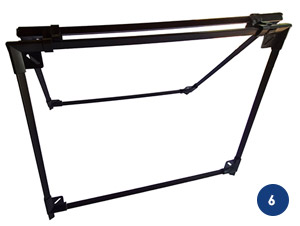
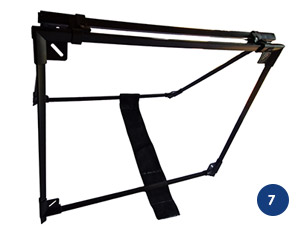
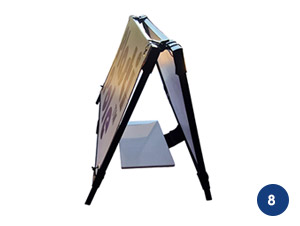
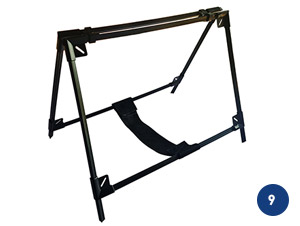
The Pointer Board consists of two hinges and two framed estate agent boards. The frames are constructed of plasti poles and corners, componenets we have been selling for the past 10 years. Once assembled the pointer board is easily stored as a result of its movable parts in a stacking formation. When displaying the boards they are then easily unhinged and erected with support strap. The purpose of the strap is to ensure the sign is stable and stays in place.
Most A-Frames on the market are displayed in landscape format. The plasti pole pointer board offers both landscape and portrait display options. Plasti Pole pre-assembles the hinges for client convenience.
HOW TO SET UP THE A-FRAME
Setup instruction in order
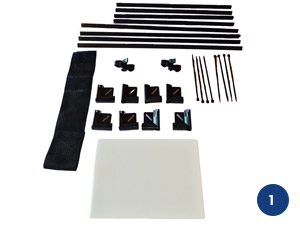
- Lay out all the components for setup
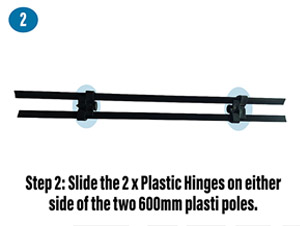
- Slide the 2x plasti Hinges on each other side of the two 600mm plasti poles
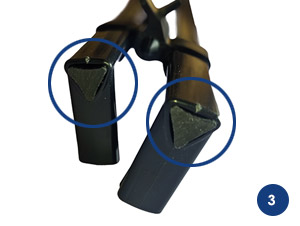
- Slide the 4 corners on either side of the 600mm plasti poles making sure the solid top part is facing upwards and the opening is on the sides
- Slide on the 4x 470mm plasti Poles in on all four corners
- Slide the final four corners onto the bottom of the 470mm poles to make the legs match the top corners
- Finally slide the final 2 plasti poles cross bars to make up your A-frame
- Apply Velcro to both sides of the 600mm bottom poles for stability before you cable tie the advertising board
- Adjust your A-frame, cable tie your advertising board to the poles on both sides and then apply a weight (brick)
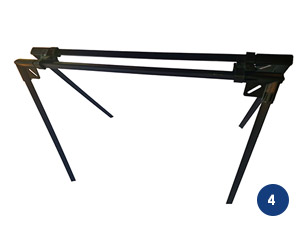
- What it should look like with out a board and weight (brick)